Building an Amateur Radio Transceiver 20A DC Filter (for ICOM radios) and more...
I recently purchased an ICOM ID-5100 Radio for my shack and was receiving a lot of noise on the 2m band, to help reduce this, I wanted to see if a DC filter would help.
Answer is it did, but not a huge amount, but still worth having. This guide includes a full parts list if you are in Australia, so you can build one of these yourself exactly the same.
Requirements
From the power supply, I have a 3m Power Run past computer equipment. Obviously, this will pick up noise along the way, so I wanted a filter to place near the radio to ensure a smooth filtered DC input right at the radio.
The main Requirements for my DC Filter are:
- Filter out any ripple or noise above DC (or as much as possible).
- Provide Common Mode noise rejection for any transients on the power cable run
- Plugs into the existing ICOM Power connectors, so nothing needs to be chopped/changed
- Enclosed and safe, no shorting out on things.
- Not too expensive, since I didn’t know how much this would help.
- Enough current capacity for my Transceiver.
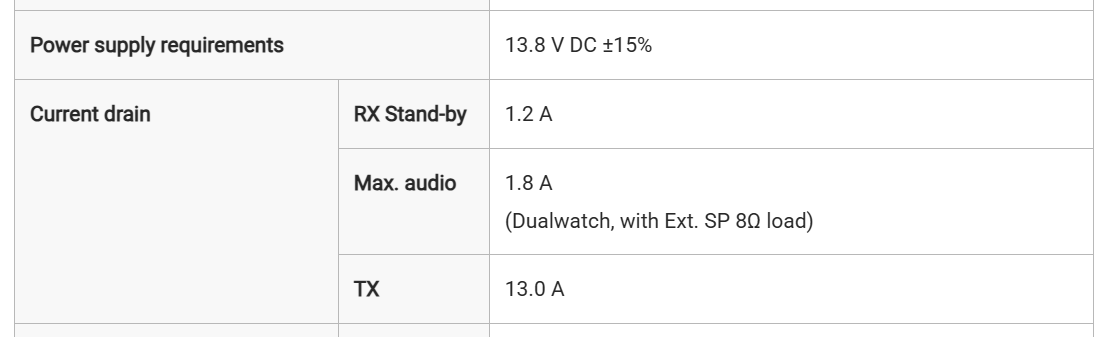
The ICOM ID-5100 Power Requirements
Current draw on Radio is rated at 13.0A, so a 20A filter should be fine to cover this radio. In reality it draws about 9 Amps when transmitting at 50W output, and about 0.4 Amps in dual watch standby, so plenty of headroom there in the specifications. Picture of ID-5100 and specifications courtesy of ICOM Australia

Filter Design
To make it easy, I found these pre assembled filters on Ali Express, they include all the filtering on my requirements list in a prebuilt unit, decision made. A 20A DC Filter module was purchased. This unit, seems to be OK.
The below is the schematic (converted from Chinese by Google Translate) of this module, it has all the basic parts required for a DC filter. You may wonder why multiple capacitors are used, well different value capacitors help reduce noise at different frequencies better, so this should do a good enough job.
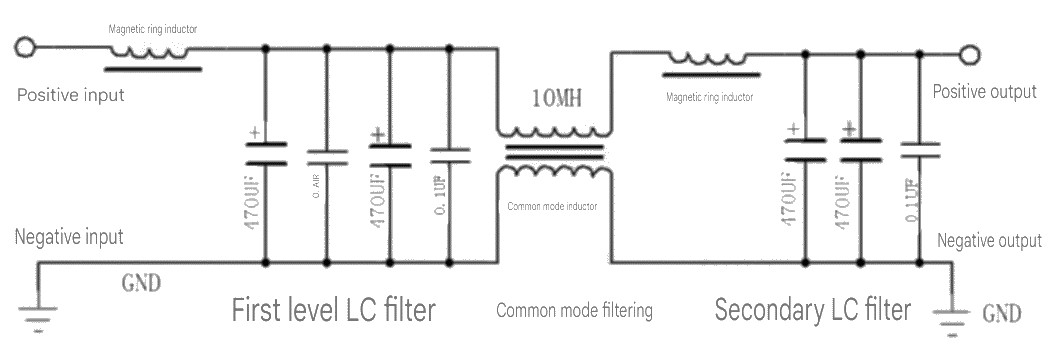
In addition to this we need connectors to add it in-line with the Transceiver, thankfully Icom use a common 15A 2 pin Connector, these are readily available at local electronics stores.
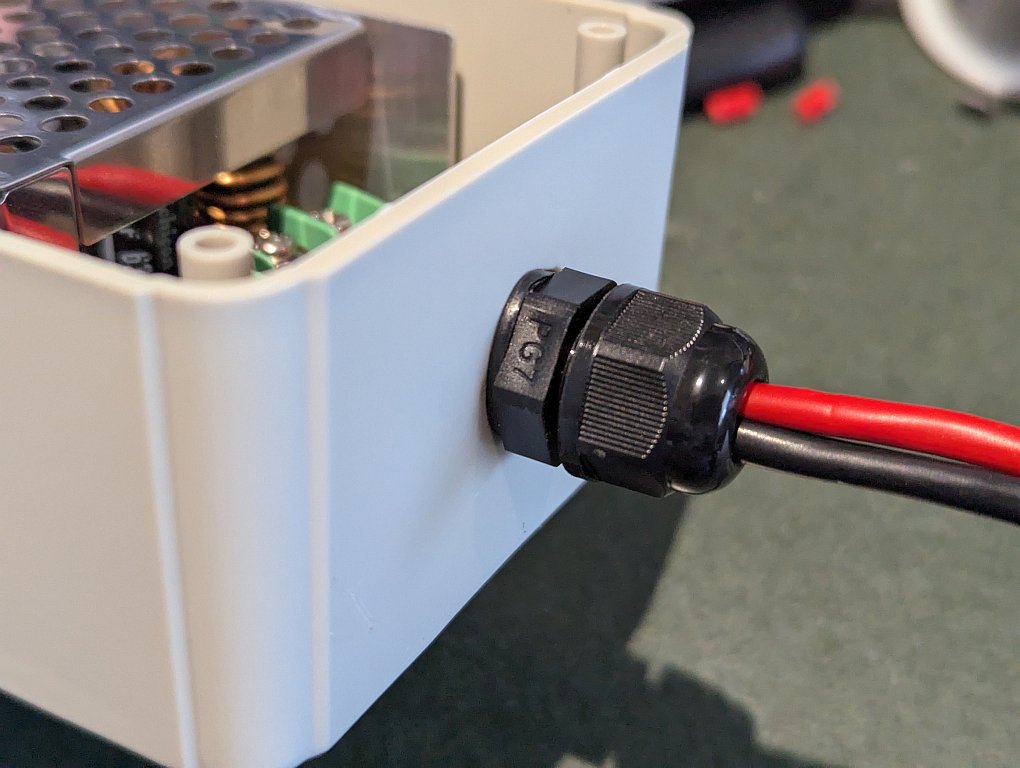
Then just ancillary items, an enclosure, some suitable wire and I usually use IP rated glands for cable entry/exits to enclosures, they just look neat and provide strain relief compared to their cheaper grommets and cord clamps, even if the IP rating is not needed.
If you want to build one of these, here is the parts list. All up it came to around $55 AUD, which is not super cheap (The AliExpress filter was almost half of this).
- 1 x Altronics H2309 - 2 Way 15A Male And Female Inline Connector
- 1m x Altronics W4052 - 15AWG Ultra Heavy Duty Figure 8 Cable (you only need about 30cm of this)
- 1 x Altronics H0122 - 125Lx80Wx50Hmm Flange Mount Box (ABS)
- 2 x Altronics H4304A – 3-6.5mm EG7/PG7 Black IP68 Nylon Cable Gland
- 1 x Altronics R4922 - 4700uF 35V High Temp. PCB Electrolytic Capacitor
- 1 x Ali Express 20A DC Filter https://www.aliexpress.com/item/1005004867076853.html
NOTE: Remember if you are a member of your local Amateur Radio Club you will likely have a discount for Altronics, reducing these prices further.
Building
You will need a few tools to help you put this together:
- 12.5mm Drill bit (to drill holes for PG7 glands)
- Deburring Tool (Optional)
- Double Sided Foam Tape (to stick down the filter in the enclosure)
- Wire Cutters
- Wire Strippers
- Spanners or large pliers to tighten the glands
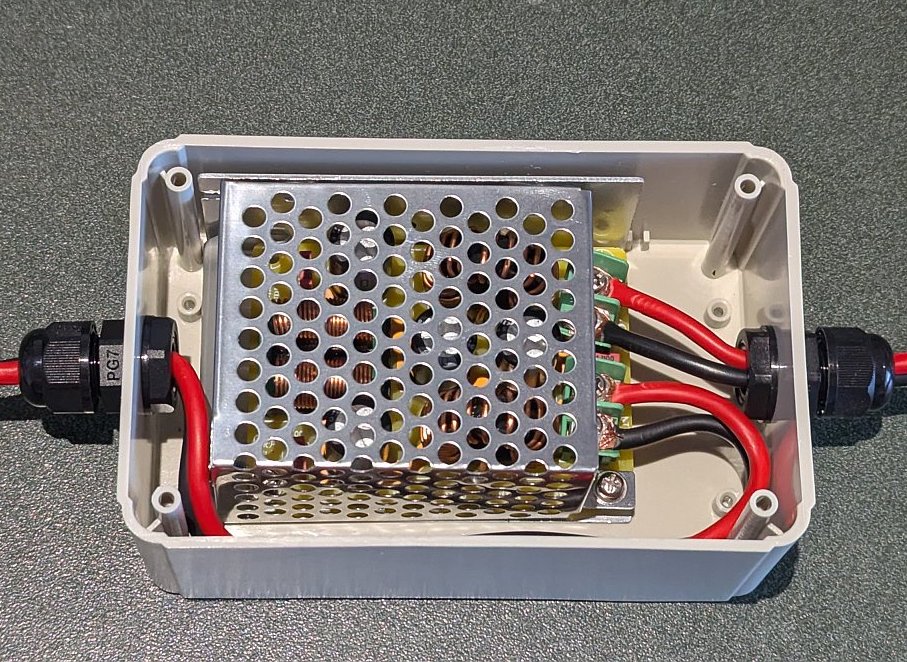
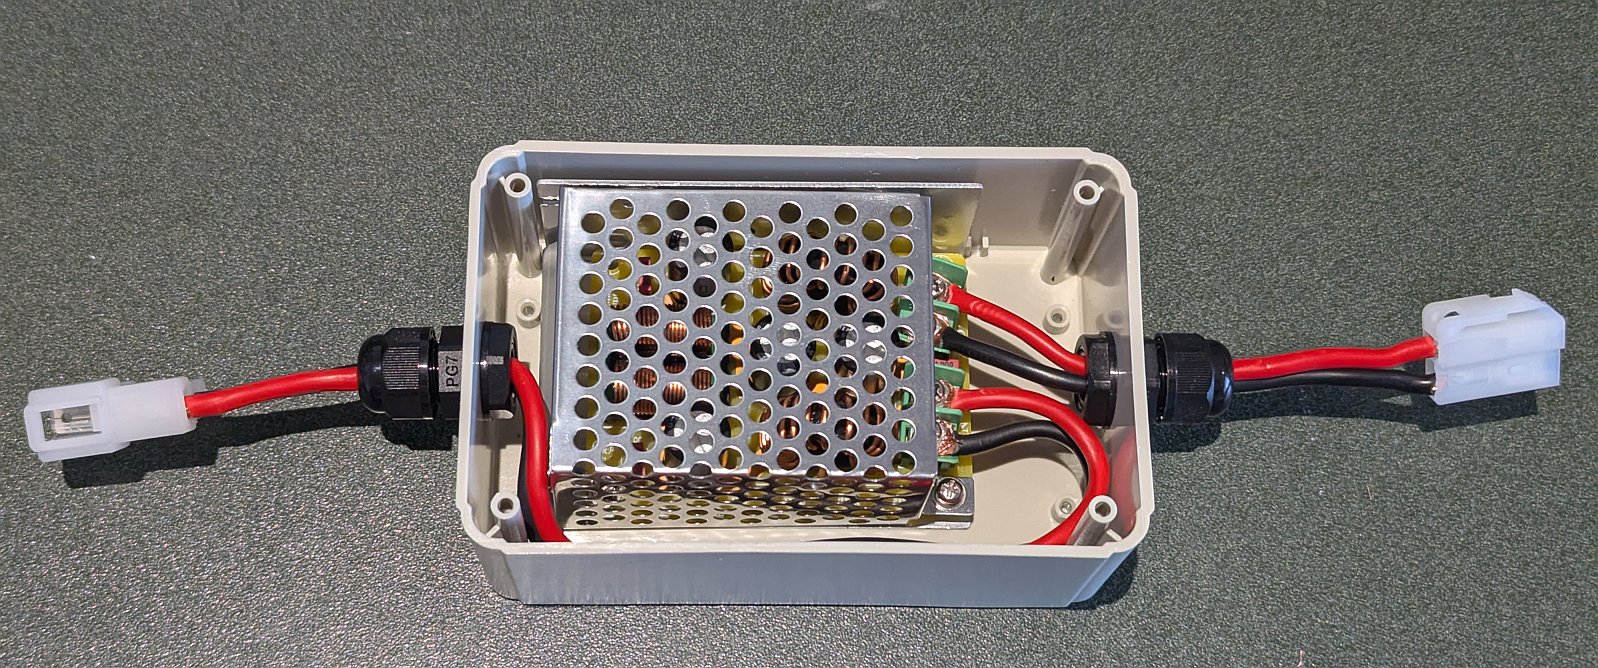
The construction is quite straight forward. I wanted it to be an ‘inline’ device, so an in and out at each end. So I drilled a 12.5mm hole at each end for the cable glands and added them in.
NOTE: Measure the centres, both vertical and horizontal, on each end of the box and mark this first; it will look a lot more professional afterwards.
Strip the wiresabout 7-8mm and connect them to the Filter Terminals, taking note of the polarity. The quality of these terminals isn’t great, but its good enough for our the use case, it seemed like they were going to break, but they didn’t. Just be cautious of any stray wires as the terminals are quite close together.
Install the cable through the glands and tighten down as shown above.

Next, you will need to install the 15A Terminals. I soldered them on, but you could crimp them with some pliers if you need to in a pinch. Again, taking note of the polarity, I used the Icom Wiring harness to confirm the polarity to 100% and make sure they were correct.
The good thing with these connectors is you can solder first (well, you must), then insert the lugs into the connector, so no forgetting the cover! And that is pretty much it!
I did add some double-sided foam tape underneath the filter to stick it to the bottom of the enclosure and prevent it from rattling, which would likely sound like something is broken in this case.
Testing
When I started testing my transceiver would power down when trying to Transmit on the 50W setting, all other power levels where fine, just High Power has a problem.
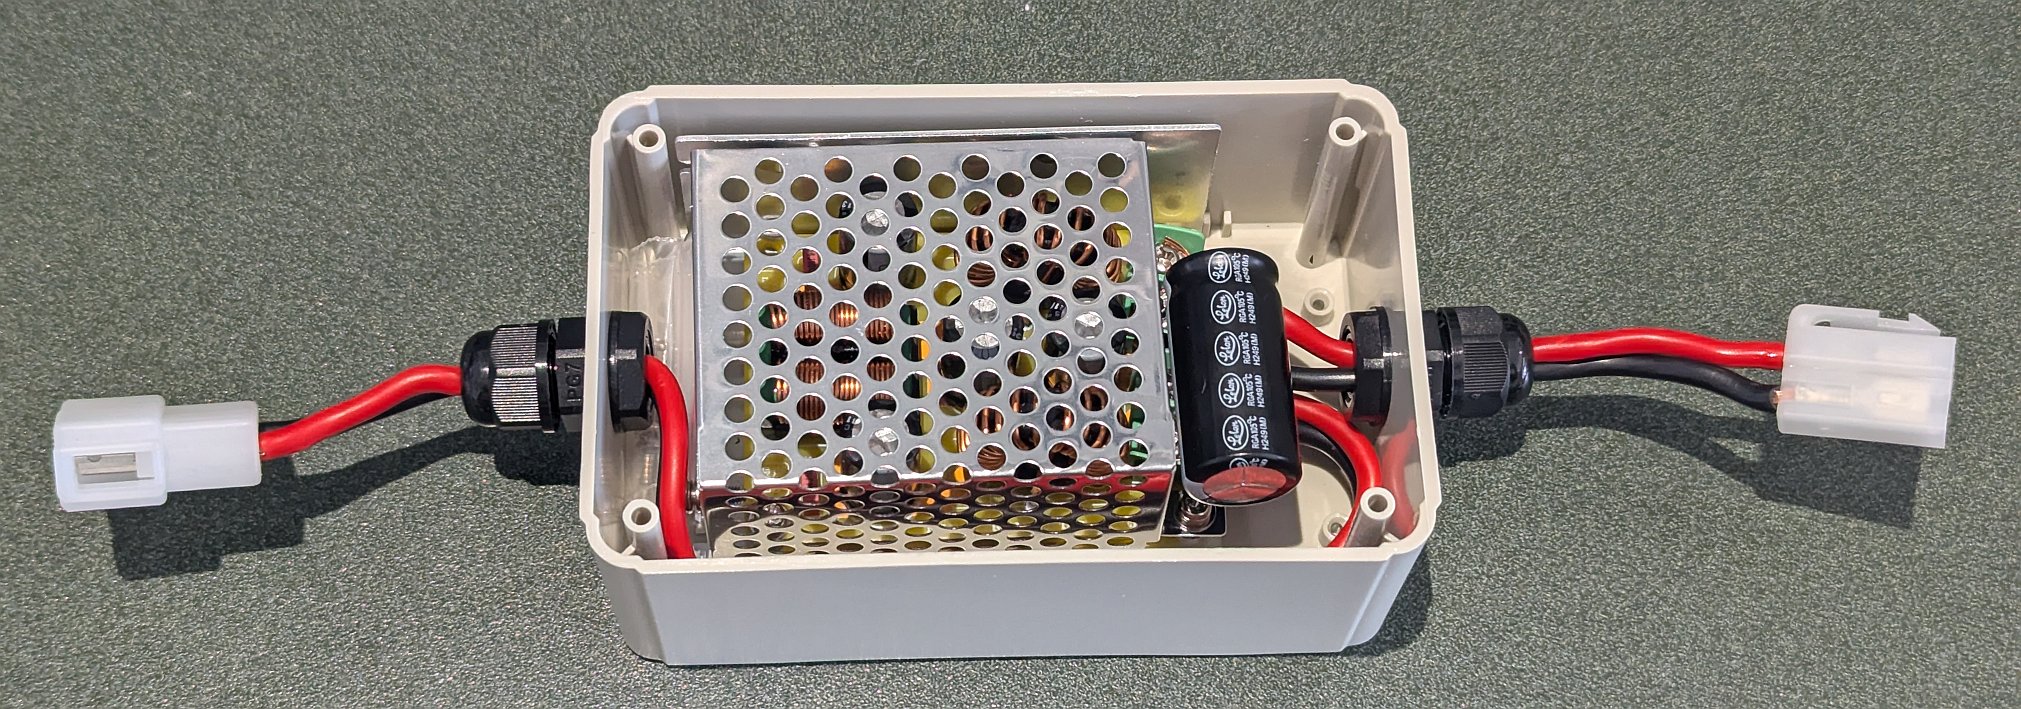
Checking this out, it seemed that the output capacitors were insufficient for the transient load when starting a transmission, and/or the inductors were maybe still a bit undersize on their current rating, so I added an additional 4700uF 35V Filter Capacitor on the output side of the filter, and the supply is now rock solid. When connecting, double check the polarity before powering up!
The background noise signal level dropped 1-2 blocks on the display, not a lot, but anything does help out, and can be the different between making some words out or not, so well worth the build effort.
Picture with additional 4700uF Capacitor installed.
Conclusion
All up a simple build and I should get many many years of use out of this. Given it can be removed easily, it could also be moved to an automotive environment to help filter out engine and other electronic noise. The Enclosure has mount points if needed as well.
Given the Standard 15Amp connector, this will likely work with many other radios and devices as well.
Whilst this worked well for me your mileage might vary, the quality of parts from AliExpress can change, so be ware. Use at your own risk.
