Building an Intercom using a couple of old PSTN phones
In this blog, I will take you through getting a couple of phones working to make a simple Intercom. WE will cover off the basic connection, then look at a couple of different ways to enhance the basic implementation. Using this knowledge, you could extend the use to being a smart interface for your home automation, or even a different form of smart assistant.
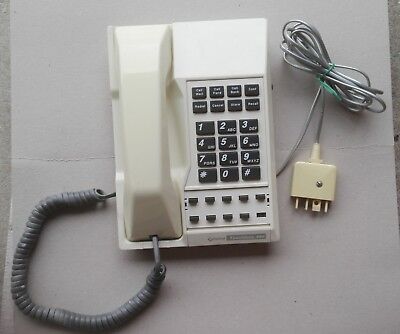
What can we do with old phones?
Despite being an old technology, it provides Microphone/Speaker and Input keys as a front end to some sort of other system. This is not unlike the devices like Alexa and google Home today. Some phones with a speaker phone could be made to operate almost identically from a user perspective.
What else?
- Chat bot?
- Home automation shortcuts – push 1 to turn the lights on/off
- It could ring when the doorbell rings for a remote location
- Use the ringer as an alert mechanism
- Could be a Hotline (no dialling) to call a specific destination – ie a line for an elderly person to contact a family member
- Backup if the mobile phone network is down, by connecting to a SIP provider
- Give the kids some technology to play with, without costing a fortune
- In their rooms?
- Cubby House to home?
- Ability to communicate to/from the shed/house
How does the phone System work
There are some standard requirements if using a telephone on a real telephone line. When used in a small or short distance we can push the limits of these, however if you were implementing a real telephone exchange, these numbers are quite critical to ensure signal gets the full length, without too much background noise.
Power Requirements
- 48V DC – Low Power supply, just enough to run the microphone and speaker amplifiers
- 60-90V AC Ring Voltage – This is typically a sine wave of around 20Hz, enough to ring a couple of bells. Older phones with physical ‘bells’ need the full 90V, where as modern telephones can use much lower voltages, some as low as around 30V to make them ring.
Dialing
- Pulse – This was the traditional method used on phones with a rotary dial, and was phased out in the 80-90s
- DTMF – Or dual Tone Multi Frequency – This is the method used today, and uses two simulatentous tones to form the row and column of the number pressed.
Connection (Layer 1)
- It uses a single pair of wires. Usually CAT-3 for what is implemented in the street, but can be better. Shorter ‘extension’ leads typically are just two wires.
- It can run up to around 5kms (or potentially further).
- Frequency for Audio is up to 8KHz
Connecting two Phones (Simplest Form)
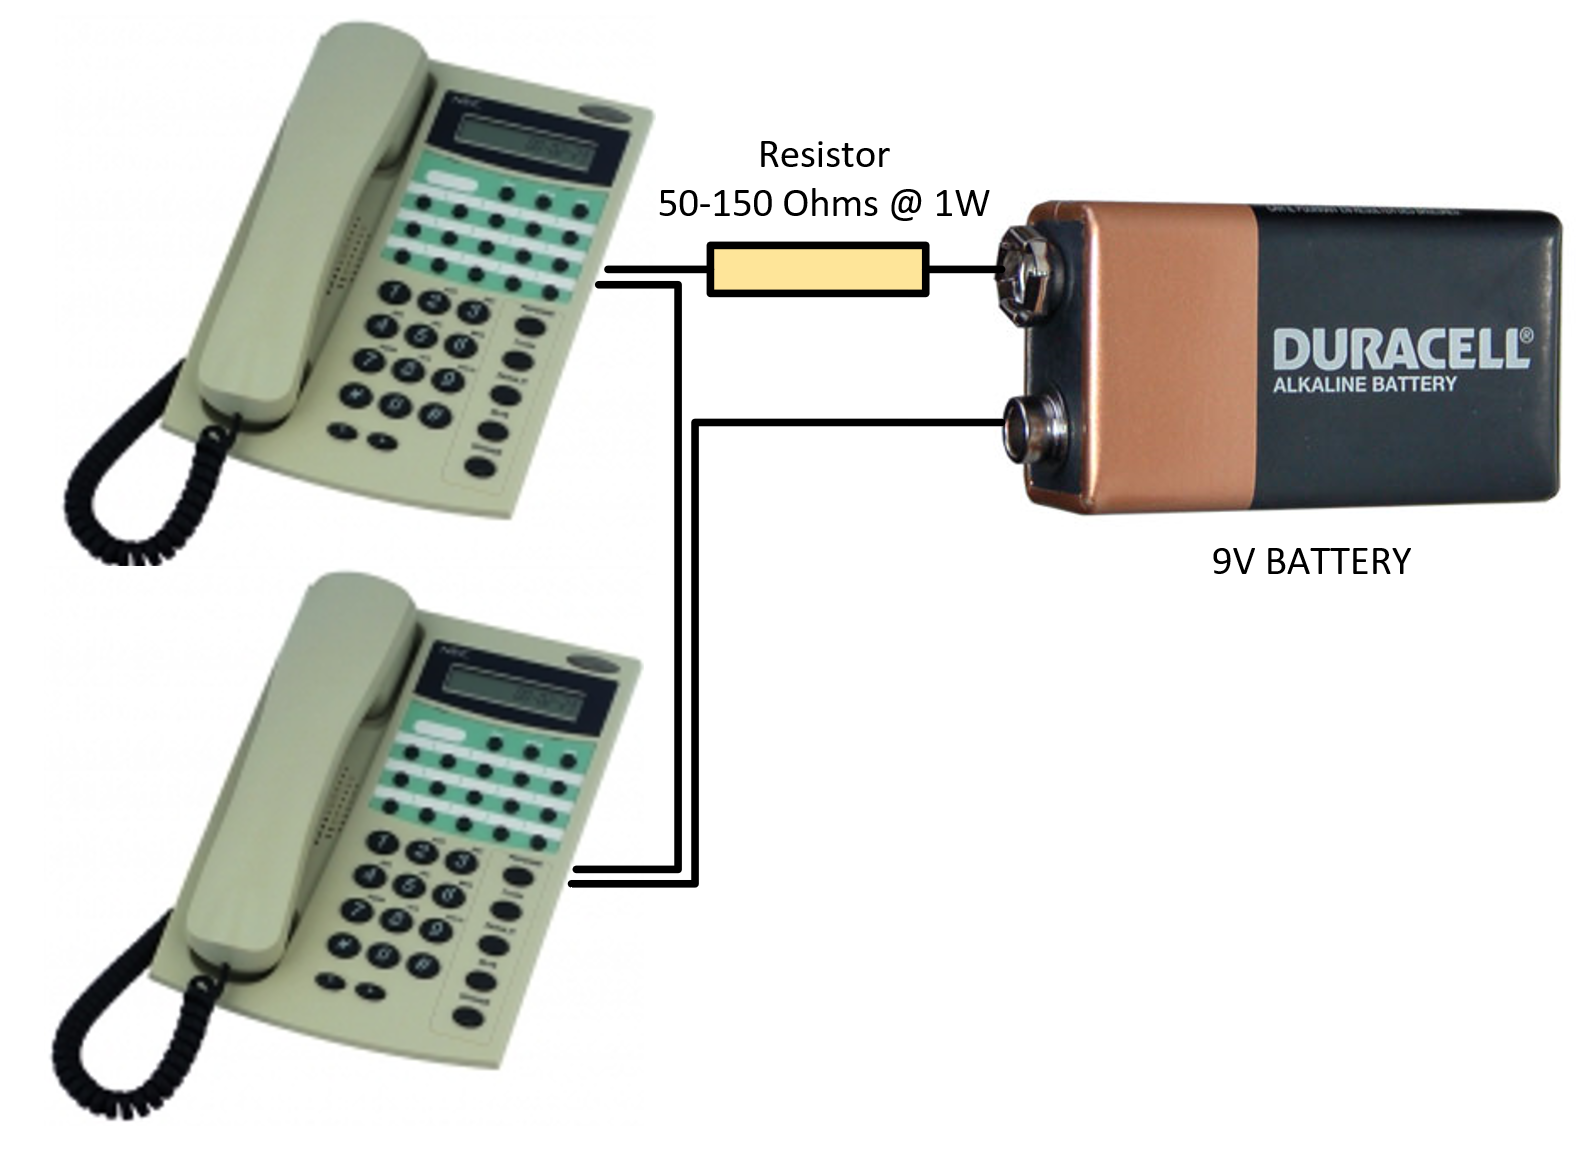
In the schematic I show the very simplest way to hook up two phones. When both phones are on-hook, their power draw is 0, so a simple 9v battery will last a very long time. For the phones specifically shown as they have a display and a clock built in, with some smarter circuitry, I had to use 2 x 9v batteries. Remembering the normal voltage is 48v, we are trying to get away with the simplest method of using these phones in this example.
If you hook up the above circuit, you will be able to pickup each phone and hear the person on the other end. However this doesn’t make a particularly useful intercom if you have to yell out to get someone’s attention.
What was missing with the above example?
Well despite being able to hear the person at the other end, there was no way to signal them to let them know you wanted to get in touch
To solve this we would need to add a few more components to our circuit:
- More Complex – Need to detect off-hook. Ringing to stop when the other party picks up the phone.
- Need 24-48V DC – A 9V battery is not enough voltage
- Need to interpret DTMF signals (DTMF Decoder to Binary)
- Need High Voltages (60-90V AC) [ modern phones need less volts]
- Something to generate a Ring signal (Oscillator)
Example (Thanks to Element14):
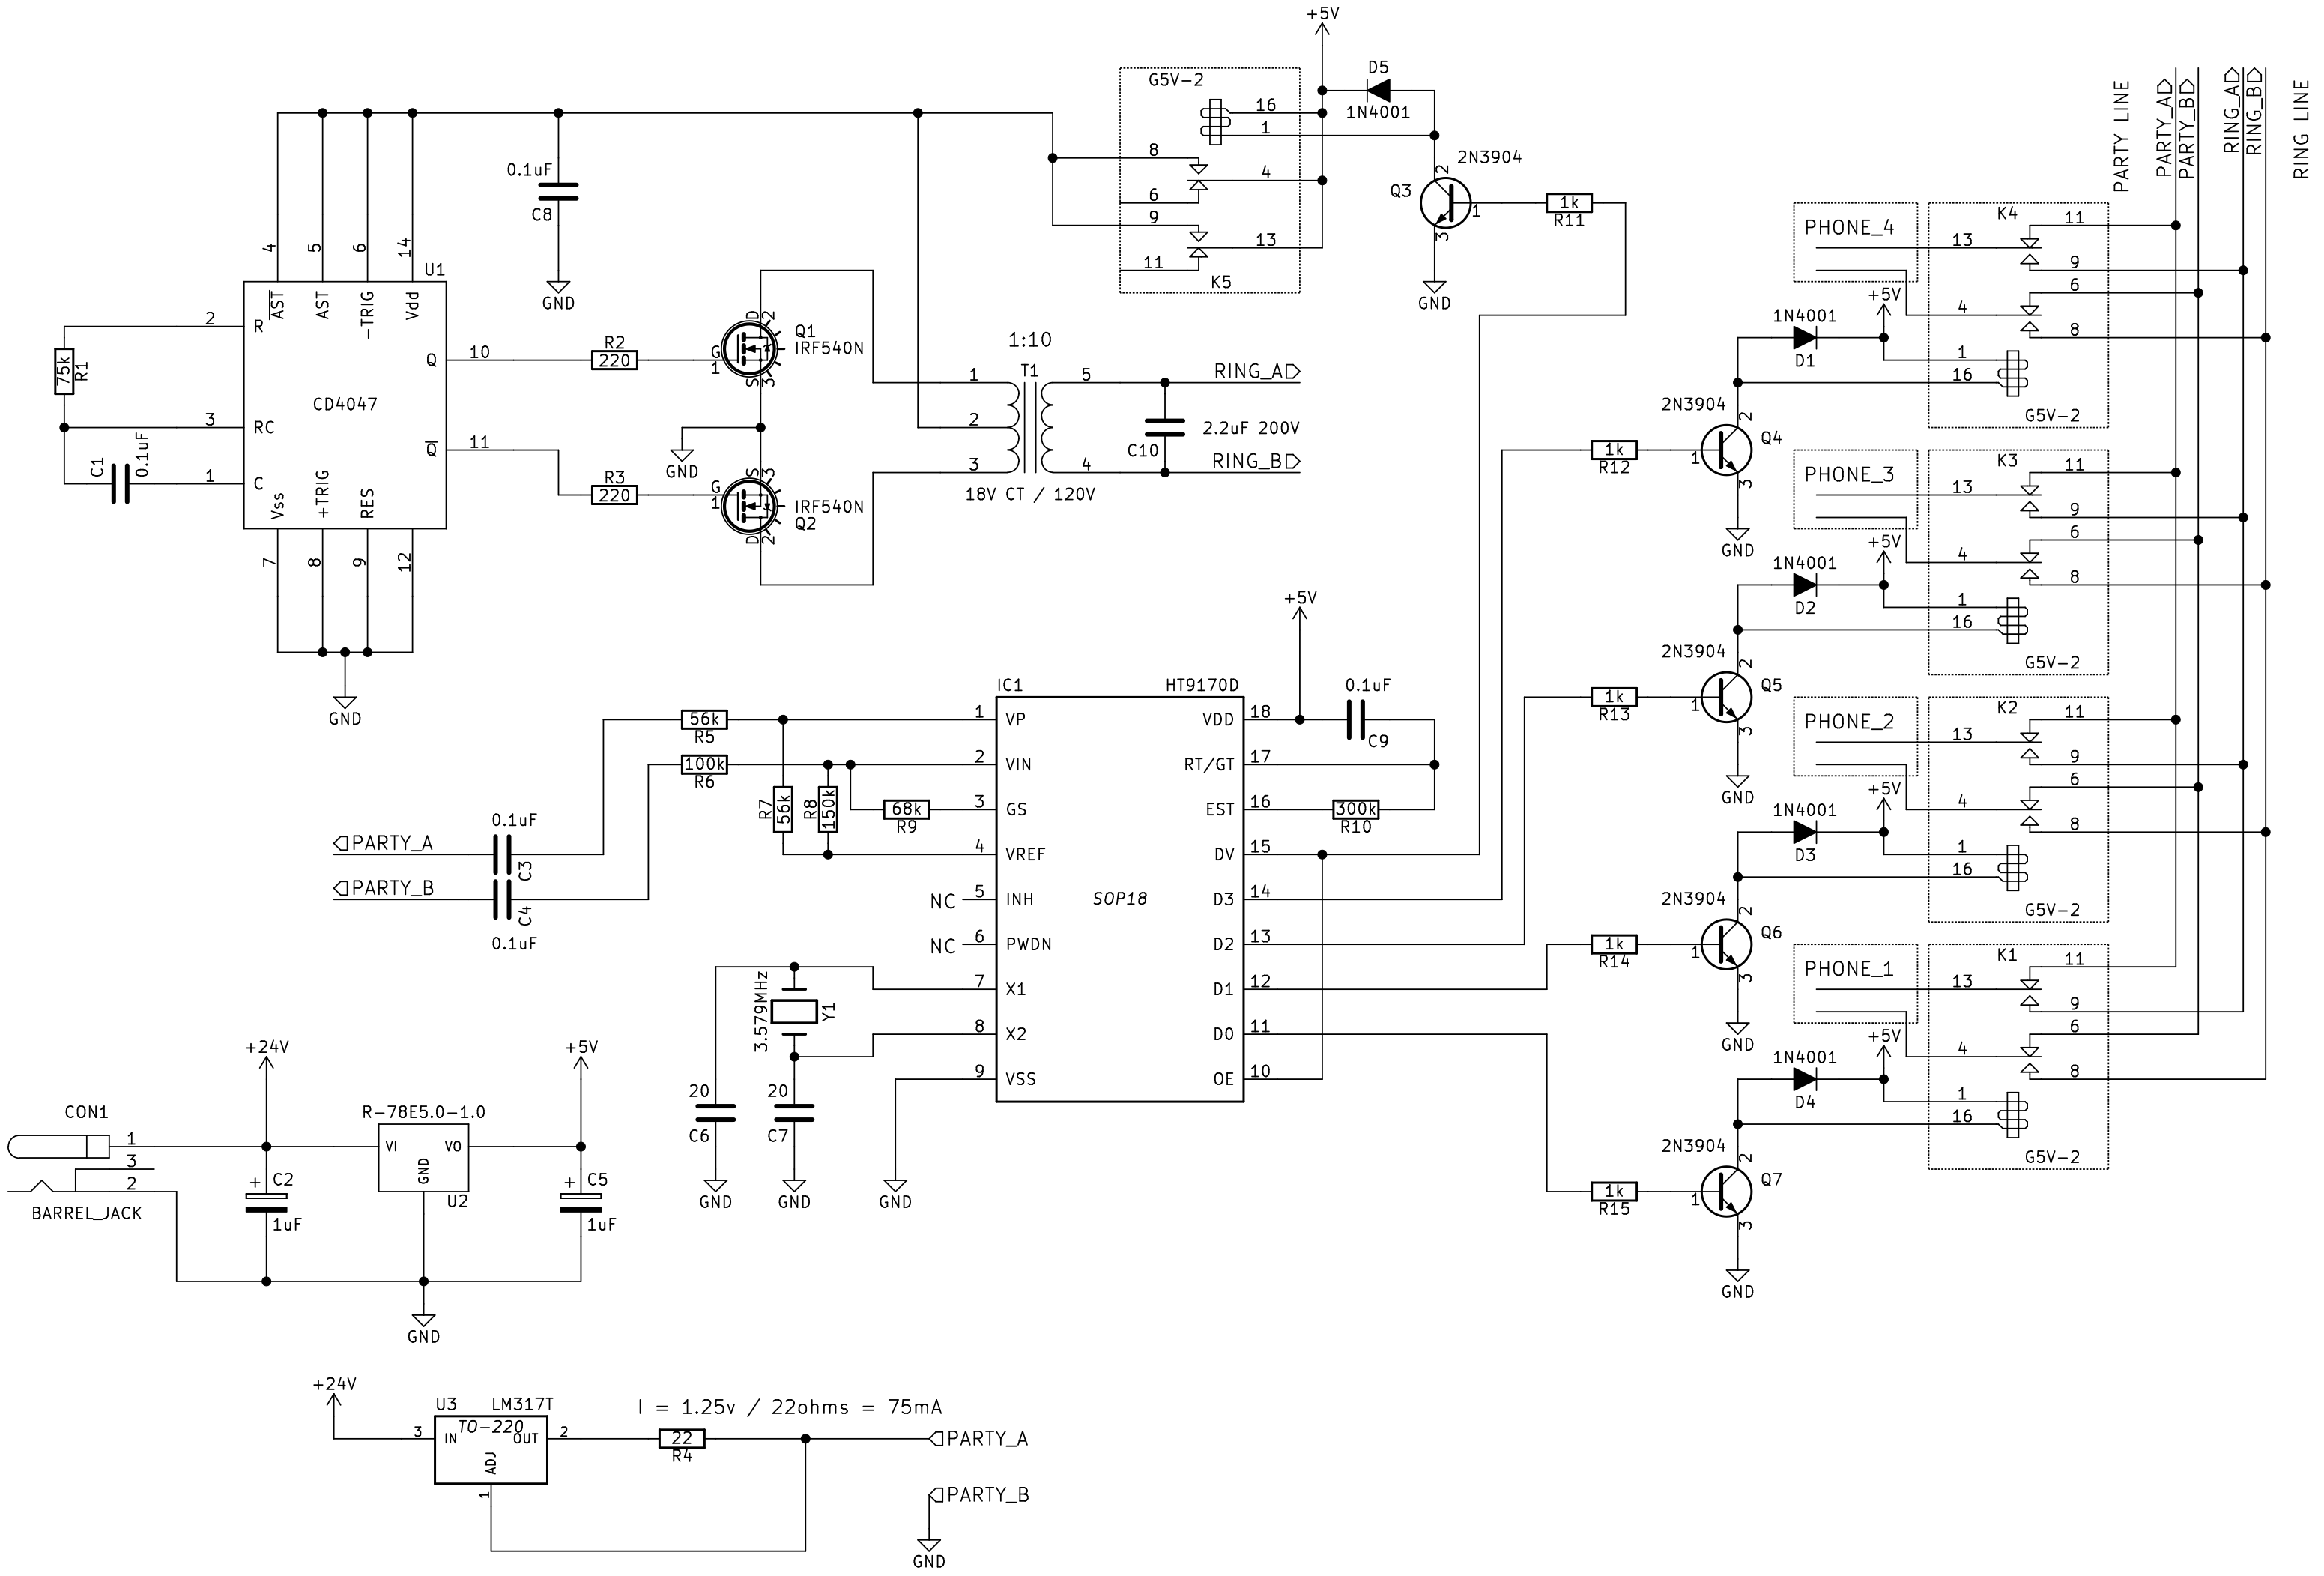
This shows a 4 phone intercom schematic. It will ring the other phone when you are holding down the button for that phone. Multi-Line Telephone Intercom: http://bit.ly/2Leyf7C
Is there an easier way?
YES – Use an ATA
- ATAs can be purchased cheaply ($20-50 second hand)
- Find one with two lines
- Can be configured to operate without a Telephone (SIP) service
- Some Routers/Modems may have phone lines that could be configured this way!
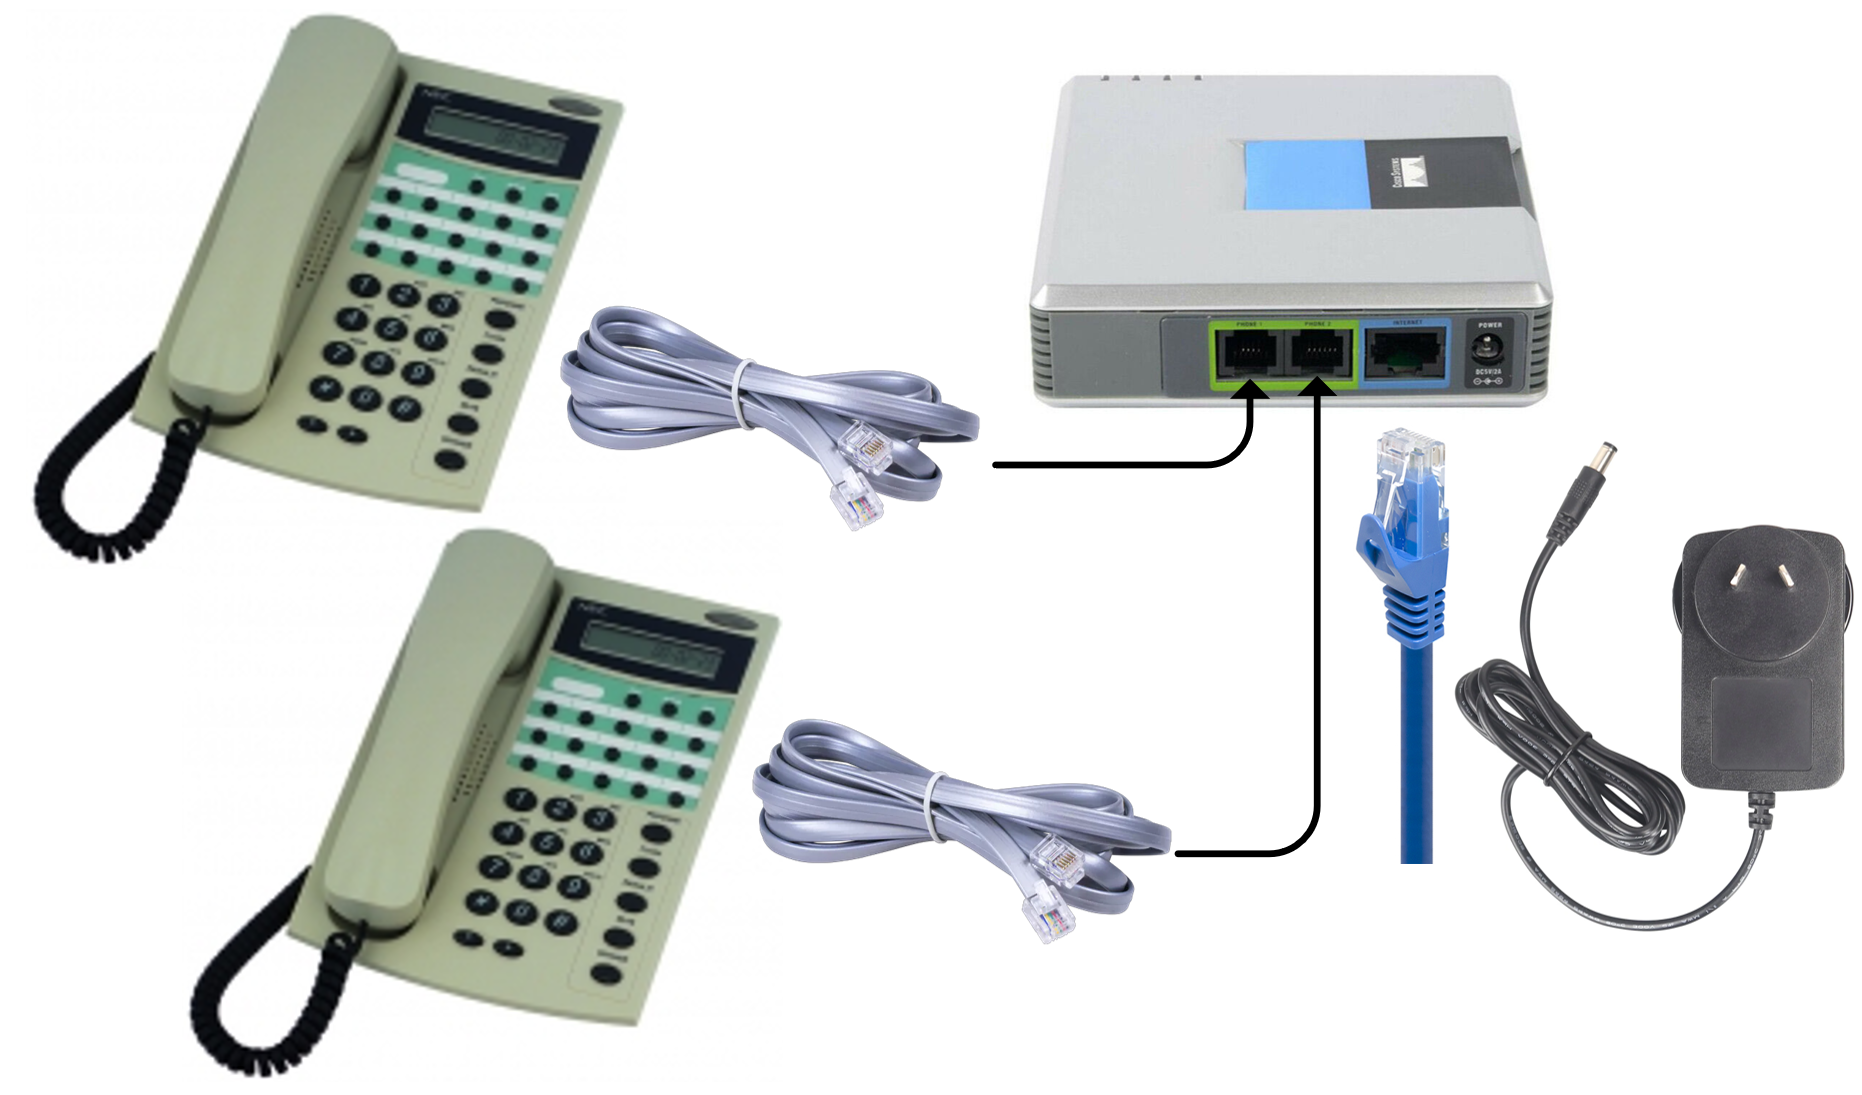
In my case I’m using a Linksys PAP2 ATA for the above diagram. There is one quirk with it, even though we don’t need a network connection, it requires one to bring up the internal localhost interface, so plugging into a switch even without Internet will be required. In my case I made an RJ45 Loopback adaptor to avoid this problem.
Configuring the ATA
Your ATA may be a little different, but these settings should have very universal names, so they shouldn’t be hard to find.
Linksys PAP2 - Regional Settings
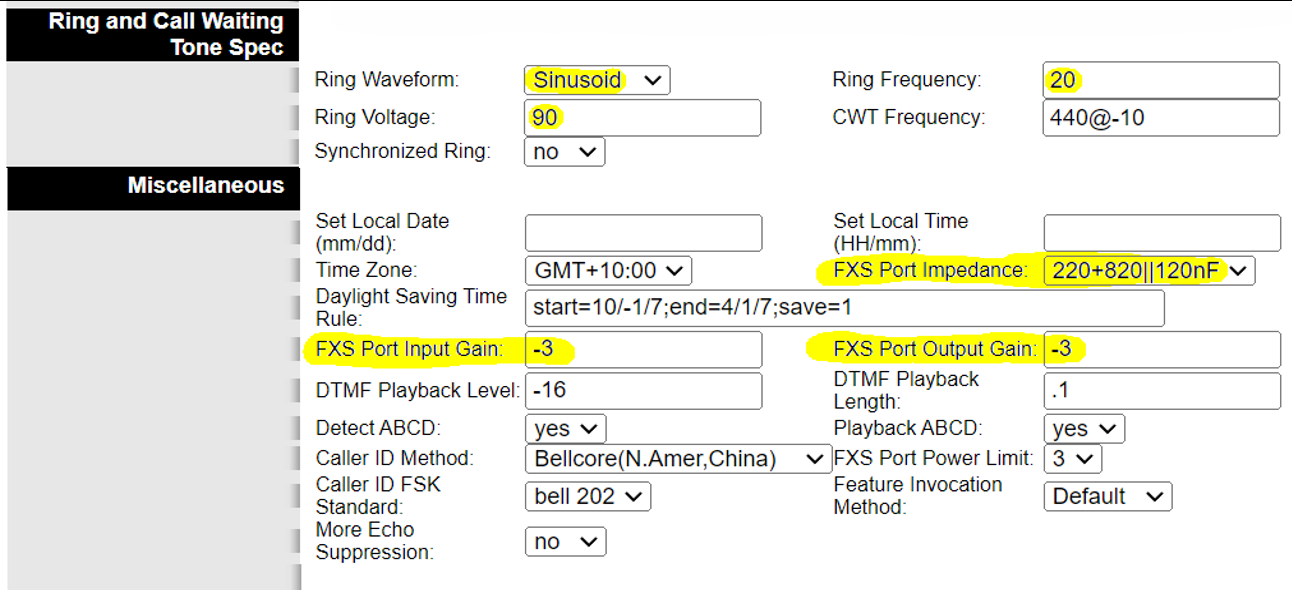
Linksys PAP2 - Common Line Settings (Apply these to all lines)

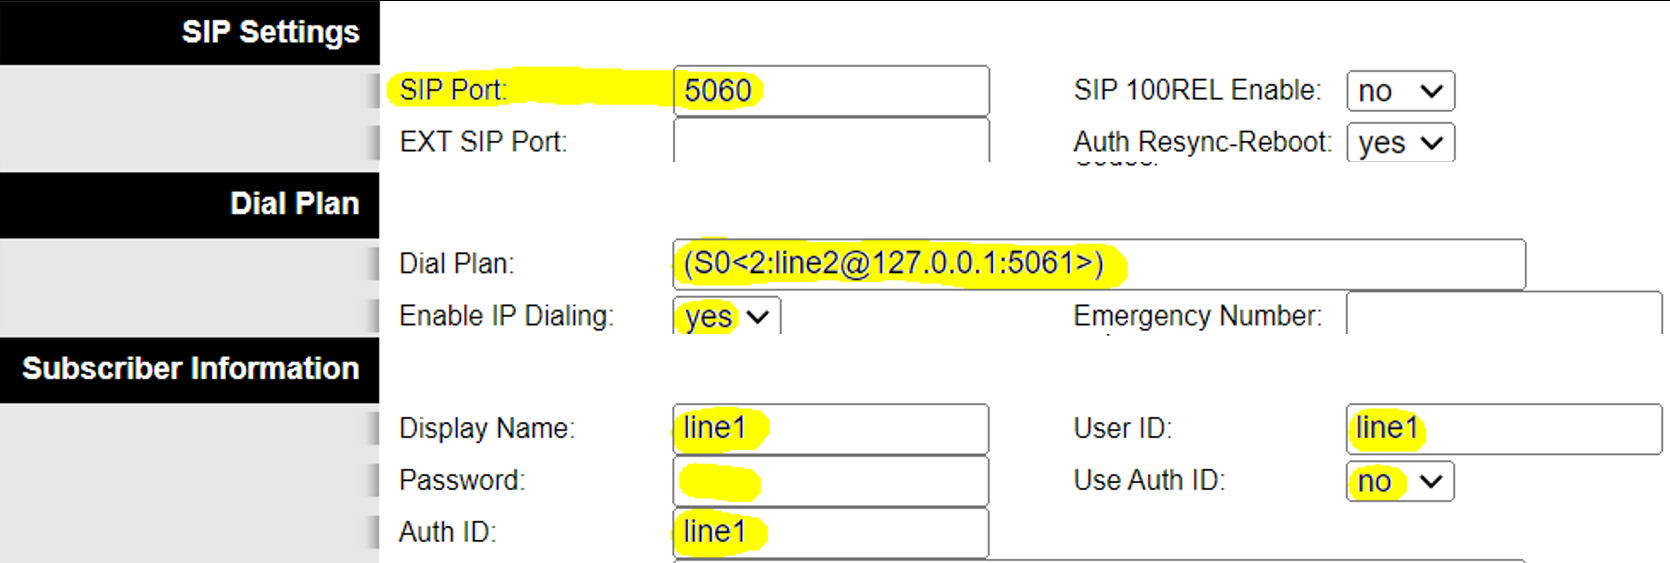
Linksys PAP2 - Line 1 Settings
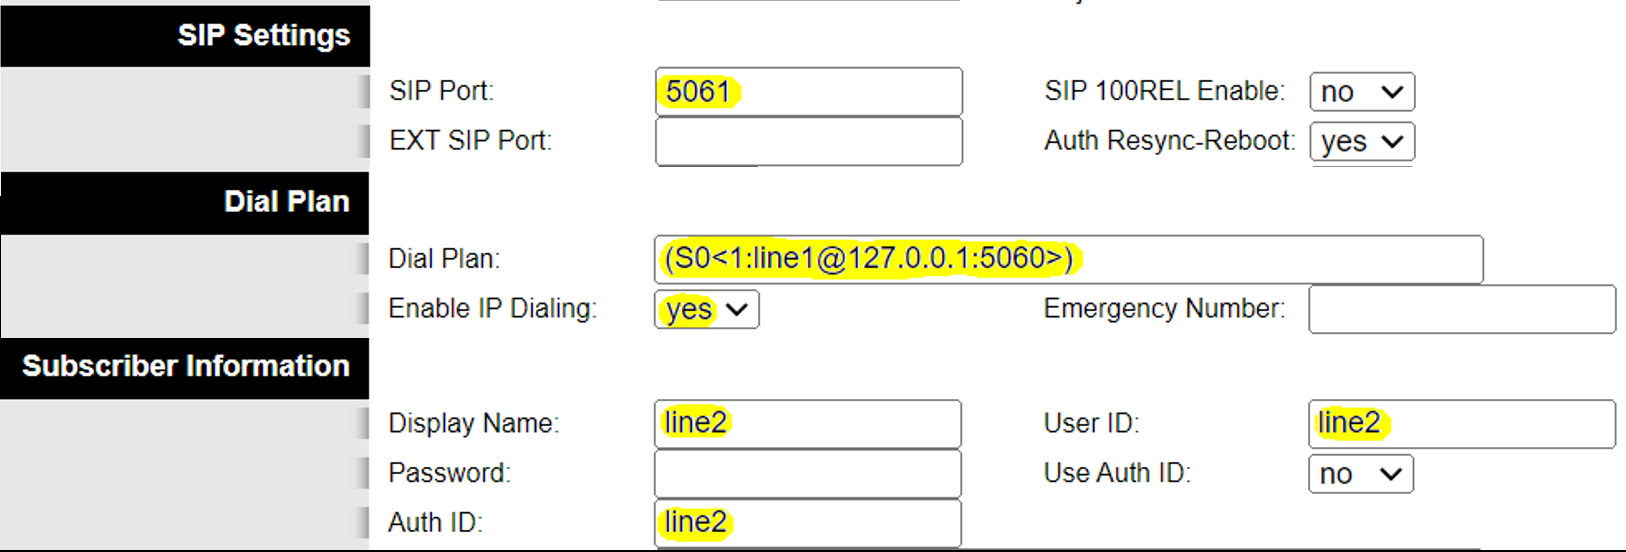
Linksys PAP2 - Line 2 Settings
Option: Make it a Hotline (No Dialing Required) Change the dial Plan to one of these. you will note the number 1 and 2 is left out, thus it will dial this without a number being entered.
(S0<:line1@127.0.0.1:5060>)
(S0<:line2@127.0.0.1:5061>)
What’s next – Expanding on what we have learnt
- Using Asterisk as a PABX Telephone System (SIP) running on an EC2 instance https://www.asterisk.org/ (you can then trunk to AWS Connect or implement a Lex Chabot service)
- Subscribe to a SIP service provider and make it a real phone?
- Make a Private Telephone ISP for the real 90’s experience
Interested in learning more about this Technology?
- Youtube: Connections Museum
- Youtube: This museum is (not) Obsolete - ‘Look mum no Computer’s other channel’