Smart Super 8 Film Projector (Part 1 – Teardown and maintenance)
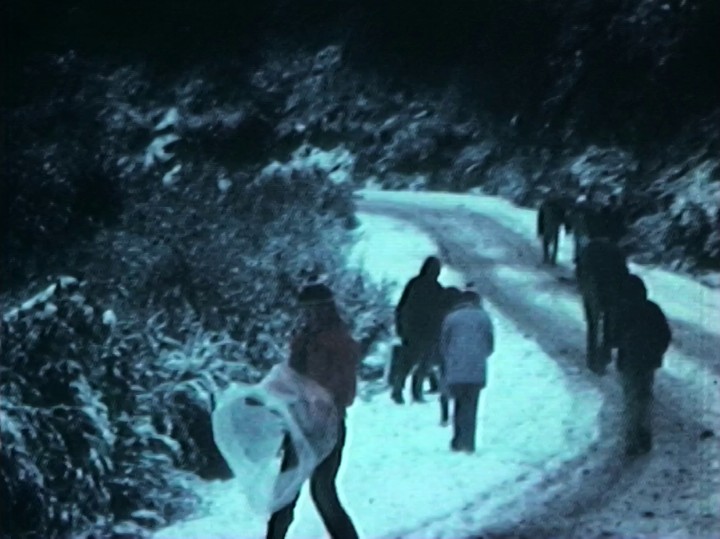
For a long time, I have been wanting to have a way to watch and capture our family’s old Super 8 Films. We have quite a few, some with audio that should be captured.
There are quite a few requirements to make this work including capturing sound. Super 8 Capture (or telecine) can be quite complex. This is part 1 to look at the projector and what we will do to provide these features.
If you don’t already know, just like some digital media, film degrades over time, specifically if not kept within reasonable temperate and humidity levels. For this reason, they need to be captured before any more degradation occurs.
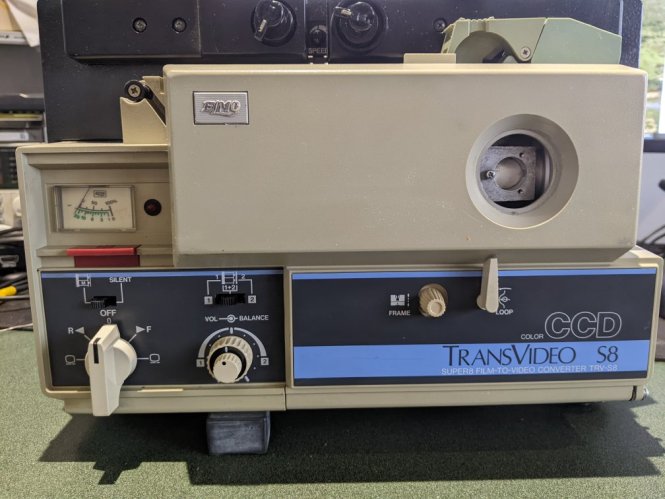
The Projector - Elmo TRV-S8
Looking around online classifieds, I found this model of projector. This one is a little different to what you would normally find. It was a specific product designed to provide composite video out from the factory. This seemed very rare, and gave me ideas, and would hopefully shortcut my plans to make a Digital Super 8 Projector.
It seems to be based on the Elmo ST-600 or the Elmo ST-180. So details of the basic controls and service information seems to be readily available.
Taking a closer look from the outside, it seems very similar, however, there are two main differences.
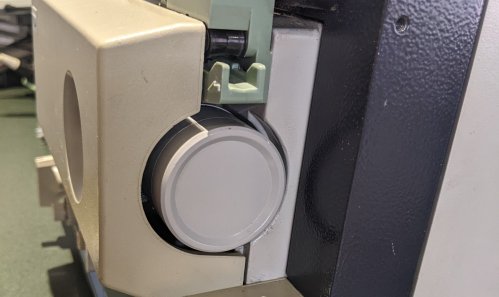
Where the lens would be on the front, there is a permanently fitted cap.
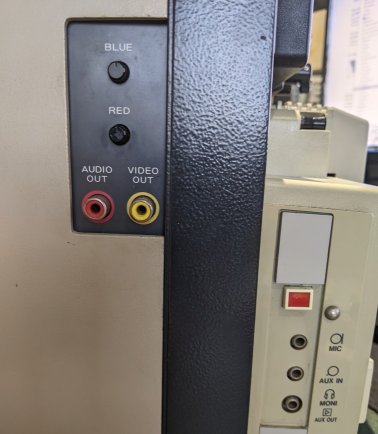
The other difference is the back panel. This panel is not on the ST-600 model at all, so the back cover has been made to accommodate these additional controls.
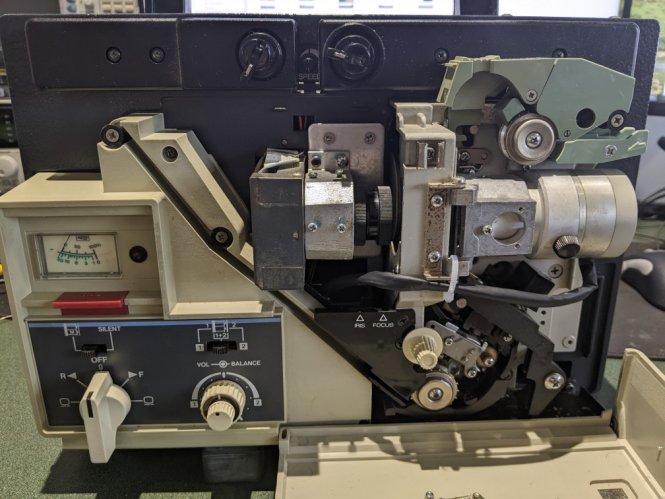
On the inside we can see this projector is backwards, with the globe (Lower wattage of 20W compared to 100W), where the lens normally is, and the camera and lens where the globe would have been. Hopefully this makes it easier to convert to a HD digital capturing projector.
Testing
Upon some simple testing, there was a major problem. The speed control didn’t work, and it just ran at full speed thumping the gate around a little louder than it should be.
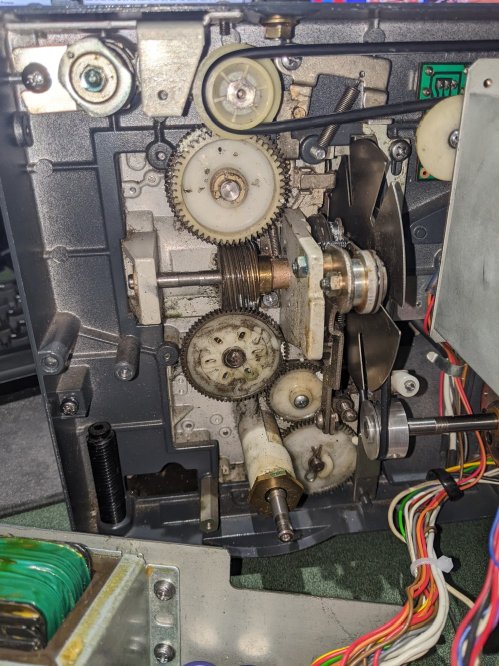
It did however play a movie, but it didn’t feed very well with the take up spool stopping regularly and needing help to turn to keep the film from ending up everywhere, so the belts definitely needed replacement.
Whilst the main shutter belt seemed OK, it got replaced as well.
Whilst testing, I did capture some video from the composite output. The CCD did work outputting a stable composite picture, but compared to video today, the quality was very poor. It also isn’t interlocked to the frames on the film, as Composite video needs to be 50/60Hz for PAL or NTSC, and film was normally 18 FPS. This doesn’t divide down well, so some frames had a combination of 2 film frames in them.
Whilst capturing, I have confirmed the audio circuits work too. Obviously with the speed wrong, it was all sorts of weird, but it was electrically working, and that is all that mattered at this stage.
Maintenance
To start with I wanted to get the projector mostly working to ensure that there wasn’t anything else more major wrong.
I obtained replacement Belts for both the shutter and main drive. These are easy to replace and solved the film feeding issues.
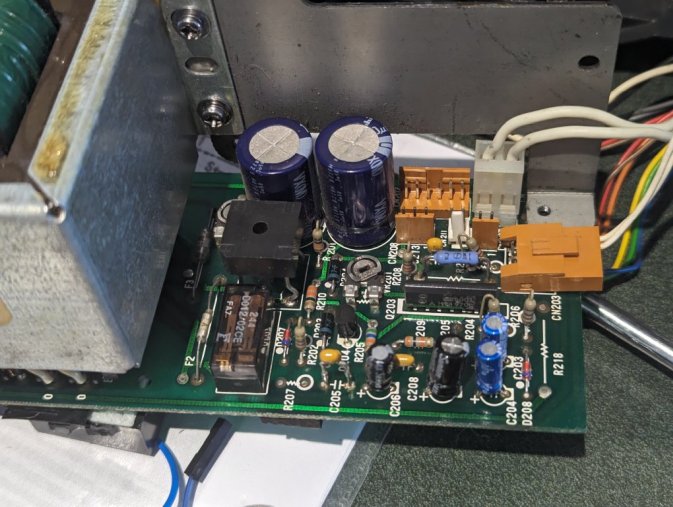
The speed controller was another story. It uses a generator to generate a signal off the motor spindle, and a specific integrated circuit to perform the control to the motor. This IC is an M51970L. And I suspect this, as there is signal from the generator, but the motor speed doesn’t change.
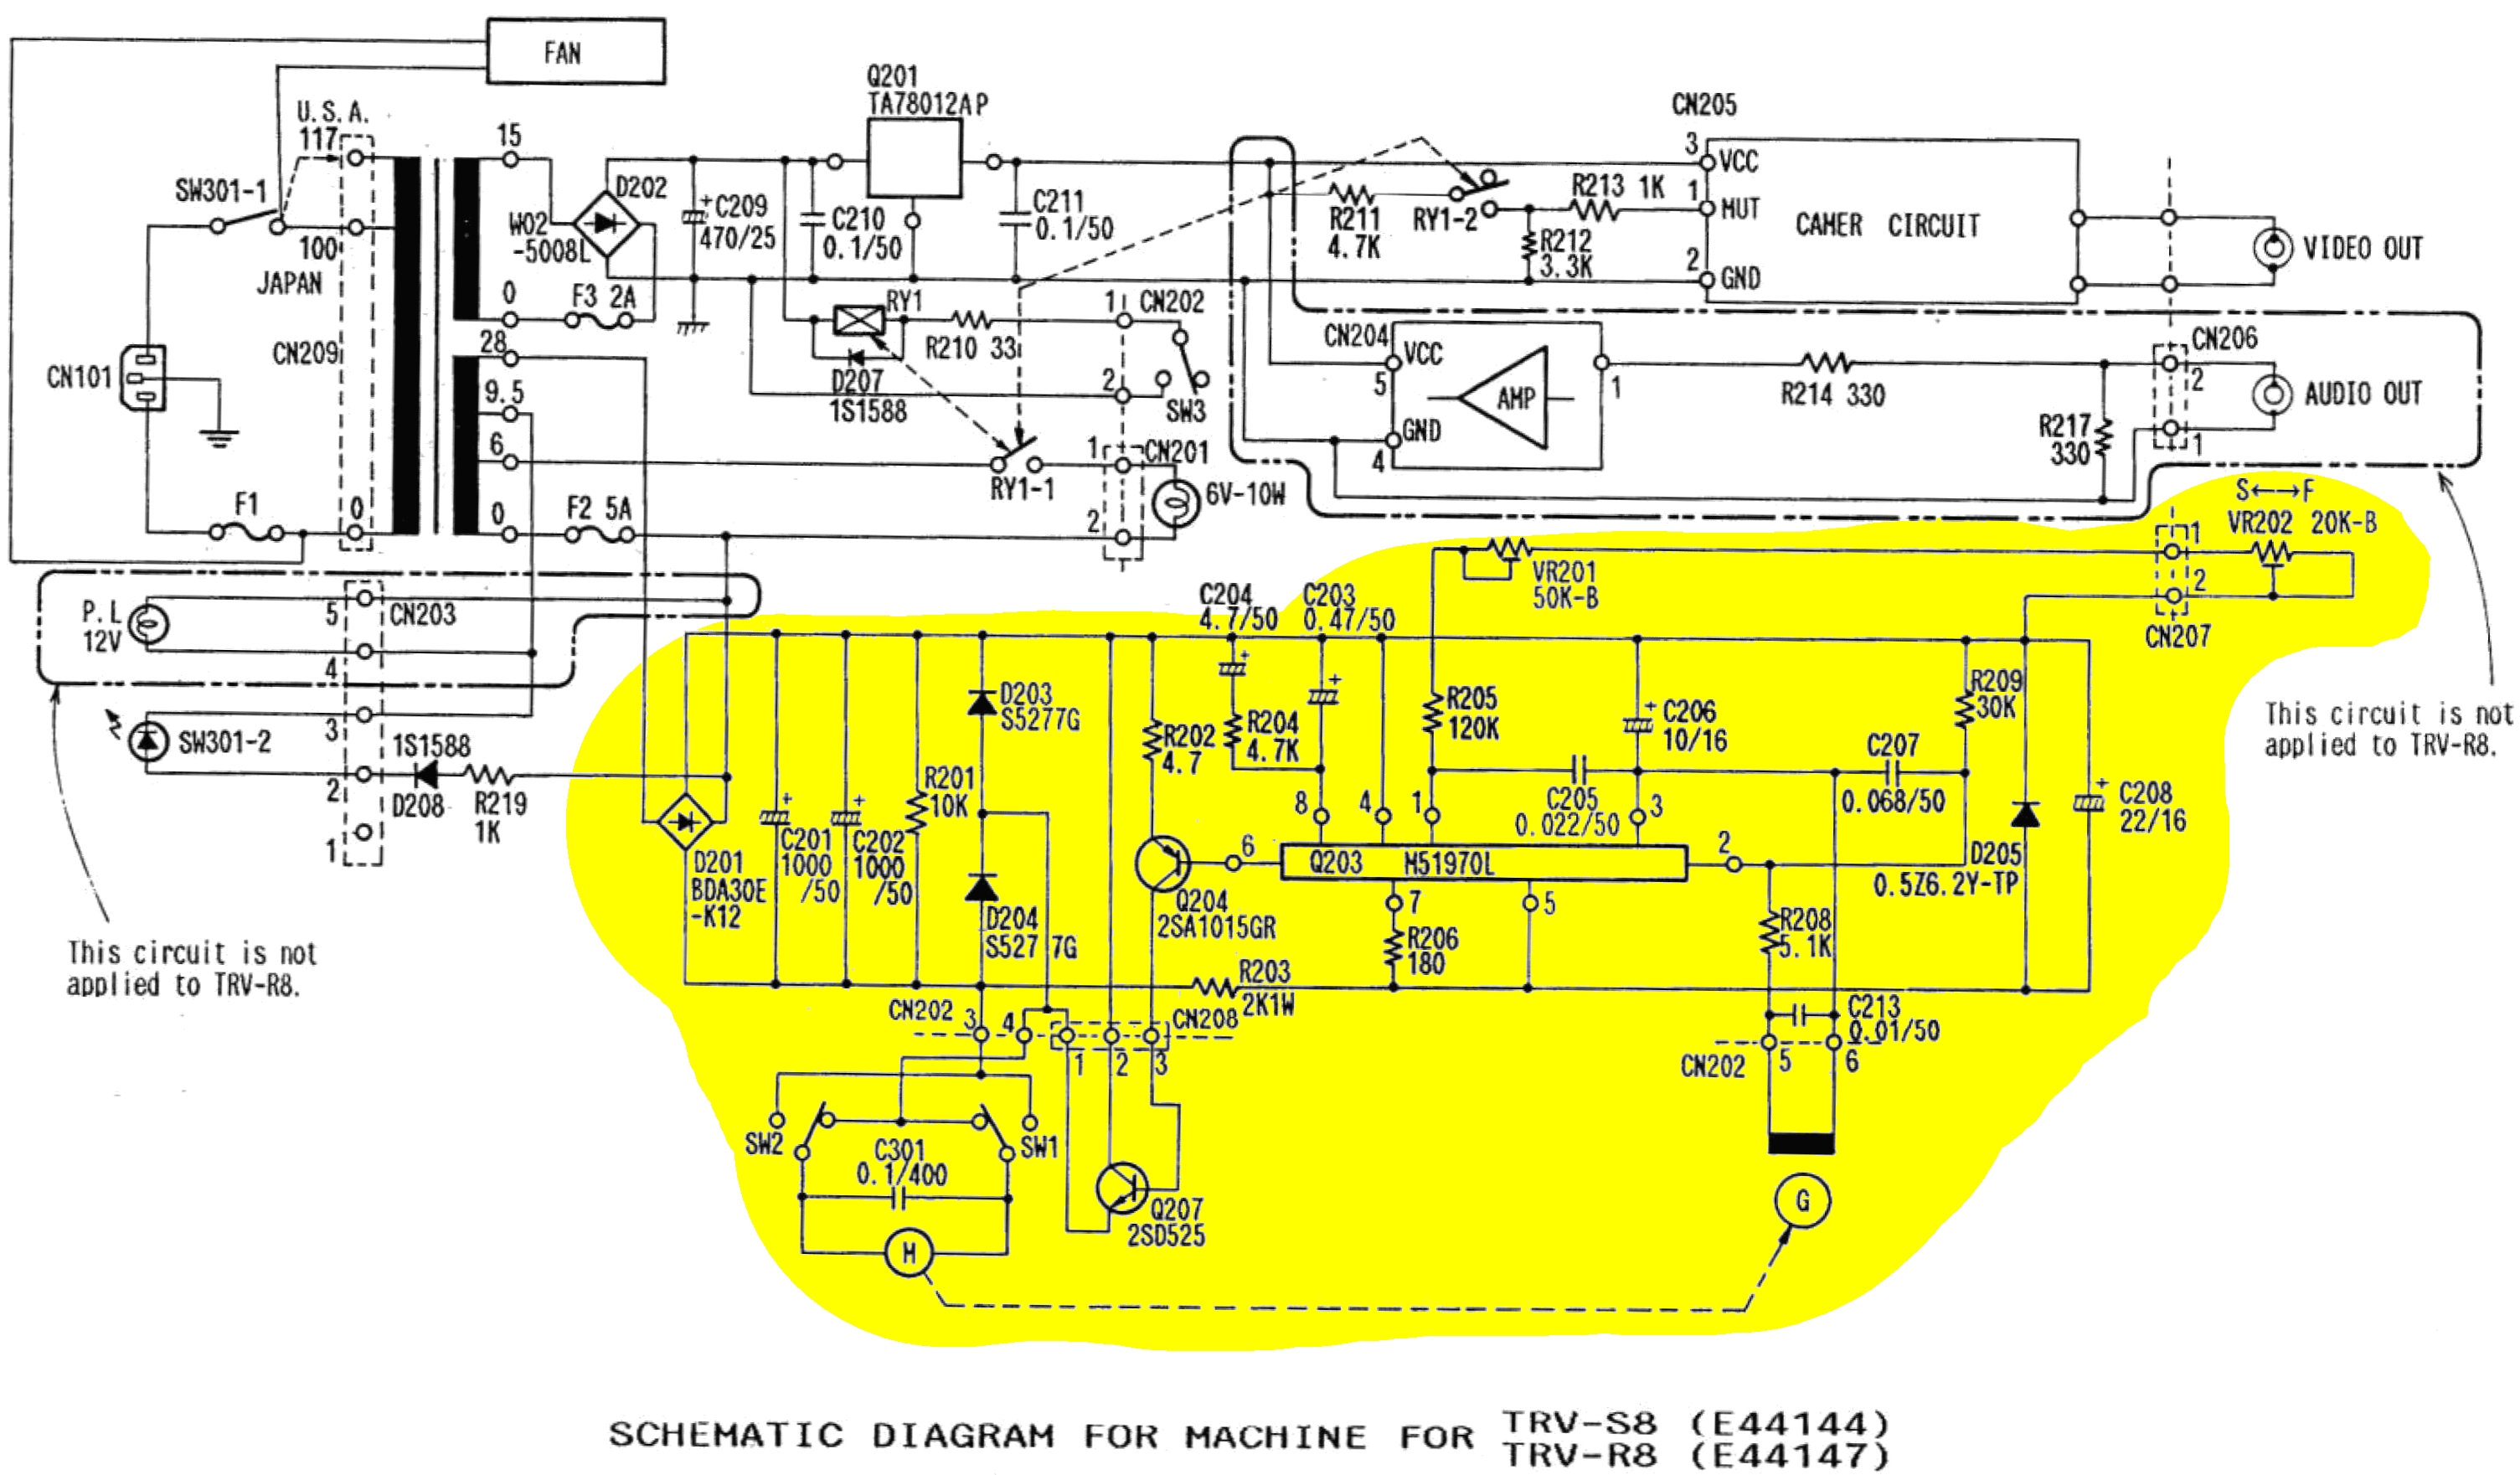
Click on the Schematic for a Hi-resolution version
Replacing this chip revealed no further change. I believe there may be something intermittent spiking the chip from the generator. So after spending some time on this one, no further work will be done, and I will focus on replacing this with the Raspberry Pi Speed controller.
Due to this, I wanted to check the motor. Driving this from an external power source revealed the motor could be controlled well down to a low speed. So this is a tick to continue with the project on this projector, all mechanical components where working well.
I did apply some lithium grease to appropriate locations to ensure that wear and tear into the future was minimised.
The Proposed Modifications
My thoughts are to utilise a Raspberry Pi, as this will be able to perform all the tasks I want to do. These include:
- I can use this to control the speed – PWM output.
- Using tha Raspberry Pi HQ Camera I can capture the video
- Use a USB Capture device to grab the audio
- Use the Pi as HDMI Output to watch the movies
- Provide a Streaming Interface?
- Provide a Web control interface (excluding mechanical requirements)
There appears to be some software available to perform most of these controls already, so in the future we will investigate that too.
Now we have a plan, lets start with the modification.
The Teardown
To begin with, we need to remove the old CCD Camera and lens assembly and the controller box for it on the rear.
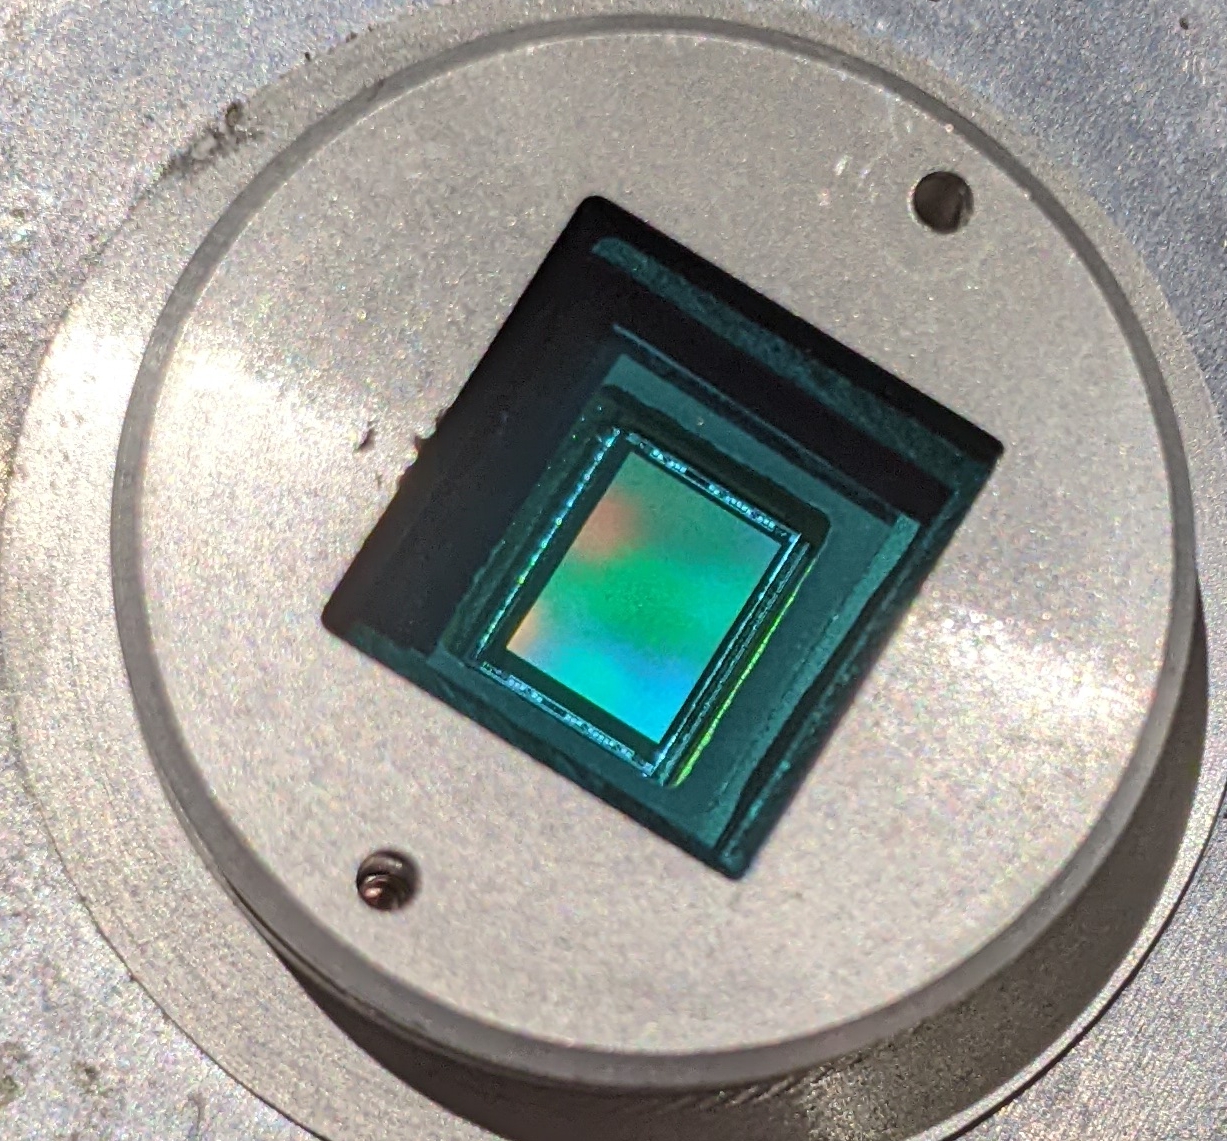
Click on the image for a CCD closeup
Unfortunately I didn’t take a picture before removing the camera box, but you can imaging a metal box about 10x10x4cm deep being removed from the back.
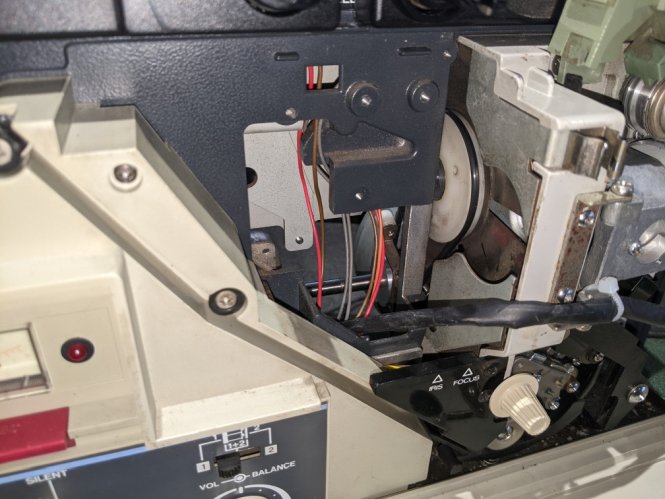
The wires you can see come from the switch and variable resistor for the speed settings, and also the main switching transistor for the motor, this is attached to the metal chassis for cooling.
The purple, red, while and black wires you can see carry the power, and audio from the main amplifier board, then back to the outputs.
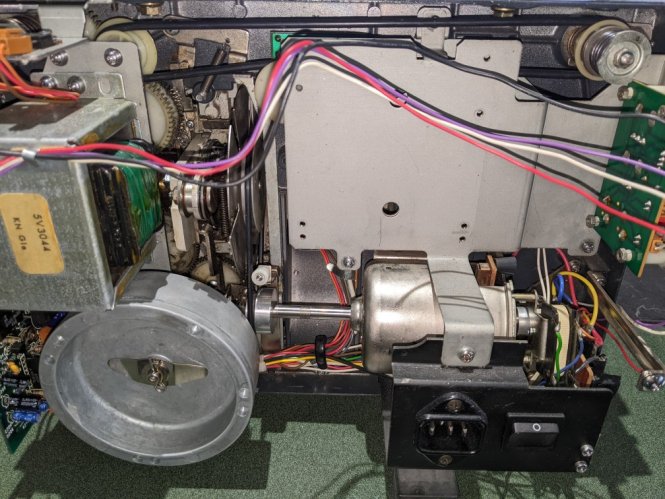
We are now left with a large cavity available for mounting the replacement Raspberry Pi HQ Camera and also the Raspberry Pi and Control circuitry on the back.
Conclusion
Now we have a base projector ready for making our modifications to. In the next part, we will look at some of the 3D Printing required to mount the lens, Raspberry Pi and the back panel connectors.
We will also need the circuit designed for the sensors, motor control and other miscellaneous inputs to be able to use the Raspberry Pi to control the projector.